
Last updated: November 4, 2022
After you’ve connected HubSpot and Microsoft Dynamics 365, you can turn on the timeline embed feature which will enable your team to view the HubSpot contact timeline directly from the Microsoft Dynamics 365 interface. This window displays the HubSpot contact’s timeline activities such as form submissions, marketing email sends, and HubSpot Score, and includes a link to their HubSpot contact record.
Timeline embed must be turned on in both HubSpot and Microsoft Dynamics 365 to complete the installation process.
Turn on timeline embed
- In your HubSpot account, click the Marketplace icon in the main navigation bar. Under Manage, select Connected apps.
- Click Microsoft Dynamics 365.
- In the Timeline Embed section, click Get started.
- In the dialog box, click Install.
- Review the necessary permissions, then click Accept. You will be redirected back to HubSpot.
- Once timeline embed has been installed, click Close.
- After installing timeline embed in HubSpot, log into your Microsoft Dynamics 365 account.
- In Microsoft Dynamics 365, navigate to the My Apps page.
- In the search bar, search for the Sales Professional app.
- In the app, click ... and select Open in App Designer.

- In the Contact section, click Forms.
- Click the Main Forms dropdown menu and select Sales Professional.

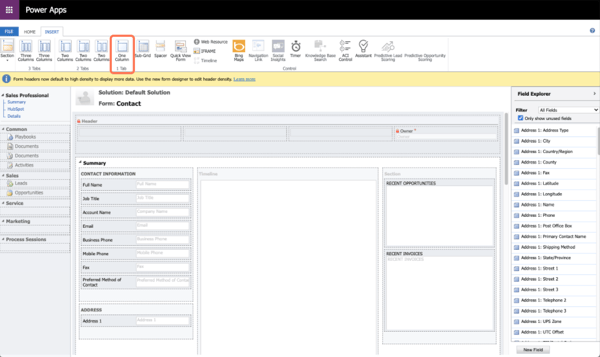
- In the form designer, click Switch to classic to open the classic form editor. Microsoft Dynamics 365 does not support adding timeline embed from the designer preview.
- In the upper left, click the Insert tab.
- Select One Column and enter a name for the property. Then, click Ok.
- On the Insert tab, click Web Resource.
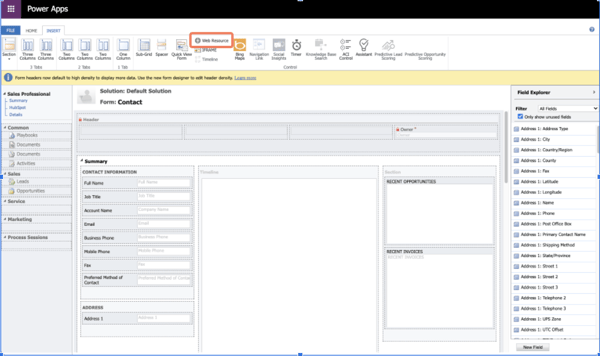
- In the dialog box, in the Web resource field, search for and select hubspot_HubSpotContactTimelineEmbed.
- Enter a unique name and label for the web resource in the Name and Label fields, then click Ok.

- Click the Home tab, then click Save to save the changes or click Publish when you are ready to take the changes live.
- Once the changes are saved, navigate to a contact in Microsoft Dynamics 365 and click the HubSpot tab to view the HubSpot contact timeline.
