
Last updated: November 4, 2022
It is recommended to set up and use the default blog subscription form for visitors to subscribe to your blog. If you want to allow visitors to subscribe to your blog on a different form, there are two methods:
Add a blog subscription field to your form
- In your HubSpot account, navigate to Marketing > Lead Capture > Forms.
- Click the name of the form.
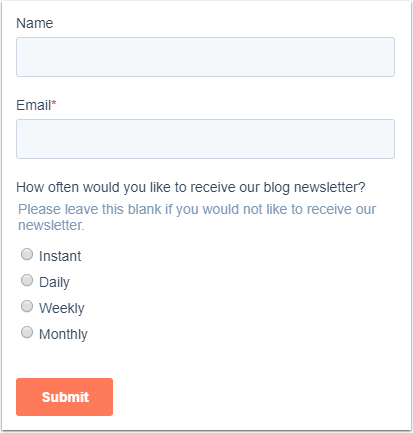
- In the left pane, enter Subscription in the Search box. The results will show your blog subscription properties, each labelled [Blog name] Email Subscription.
- Click, drag and drop your blog subscription field to the desired location in the form. In the form editor, click the field to edit its display options.
- In the top right, click Publish to update the live form.
Add a single checkbox field to your form
Create a single checkbox contact property
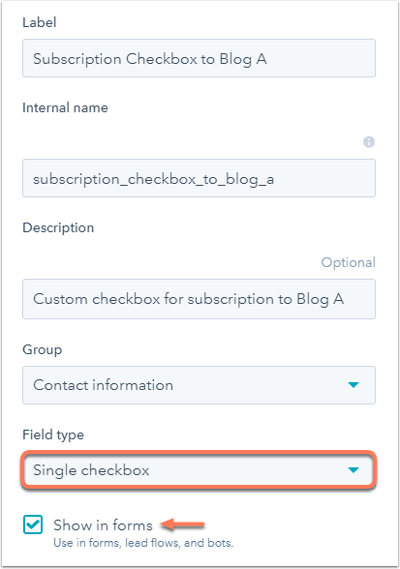
- Create a custom contact property and set the Field type to Single checkbox.
- Ensure that Show in forms is selected.
Set up workflow to add contacts as blog subscribers
- Create a contact-based workflow.
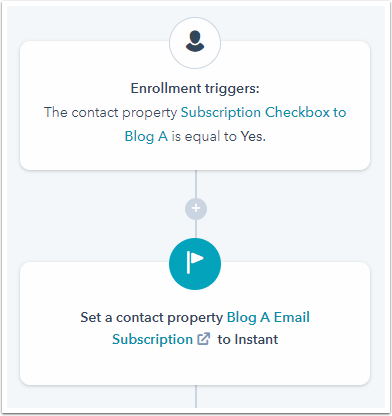
- Set your enrollment triggers to enroll contacts who selected the checkbox.
- In your workflow, click Set enrollment triggers.
- In the right pane, select Contact property.
- Click the Please select a property dropdown menu, then search for and select the new subscription checkbox property.
- Select is equal to, then click the Search dropdown menu and select Yes.
- Click the + icon to add a workflow action.
- In the right pane, select Set contact property value.
- Click the Choose a contact property dropdown menu and select the [Blog name] Email Subscription property.
- Click the Choose property value dropdown menu and select the subscription frequency for the contact.
- In the upper right, click Review.
- Review your workflow actions and settings. In the upper right, click Turn on.
Add the checkbox field in your form
- In your HubSpot account, navigate to Marketing > Lead Capture > Forms.
- Click the name of the form.
- In the left pane, search the name of the single checkbox contact property in the Search box.
- Click, drag and drop the property into the desired location in the form. In the form editor, click the field to edit its display options.
- In the top right, click Publish to update the live form.
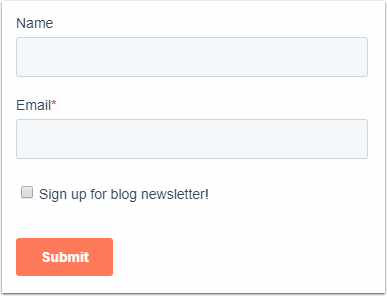
Contacts who select the checkbox and submit the form will have their checkbox property value set as Yes. This will enroll them into the workflow and update their blog subscription property to your specified subscription frequency.